Easy Apple Crisp Recipe for Beginners: The Perfect Comfort Dessert
There’s something special about a warm, homemade apple crisp straight from the oven. The aroma of baked apples, cinnamon, and brown sugar fills the kitchen, creating a cozy atmosphere that’s hard to resist. If you’re new to baking and want to make a simple, foolproof dessert, this easy apple crisp recipe is the perfect place to start. With just a handful of basic ingredients and a few simple steps, you’ll be able to create a delicious, classic apple crisp that will have everyone asking for seconds.
What is Apple Crisp?
Apple crisp is a traditional dessert made with a base of juicy, spiced apples, topped with a buttery, crumbly mixture of oats, brown sugar, and cinnamon. It’s baked until the apples are tender and the topping is golden and crisp. Unlike pies, which have a crust, the crisp has a more rustic feel, making it an easier and quicker option for those who might be intimidated by rolling out dough.
Even if you’ve never baked an apple crisp before, this recipe breaks everything down into manageable steps so you can confidently make a dessert that tastes like it came from a seasoned baker’s kitchen.
Love apples? Check out the recipes below:
What You’ll Need for Your Apple Crisp
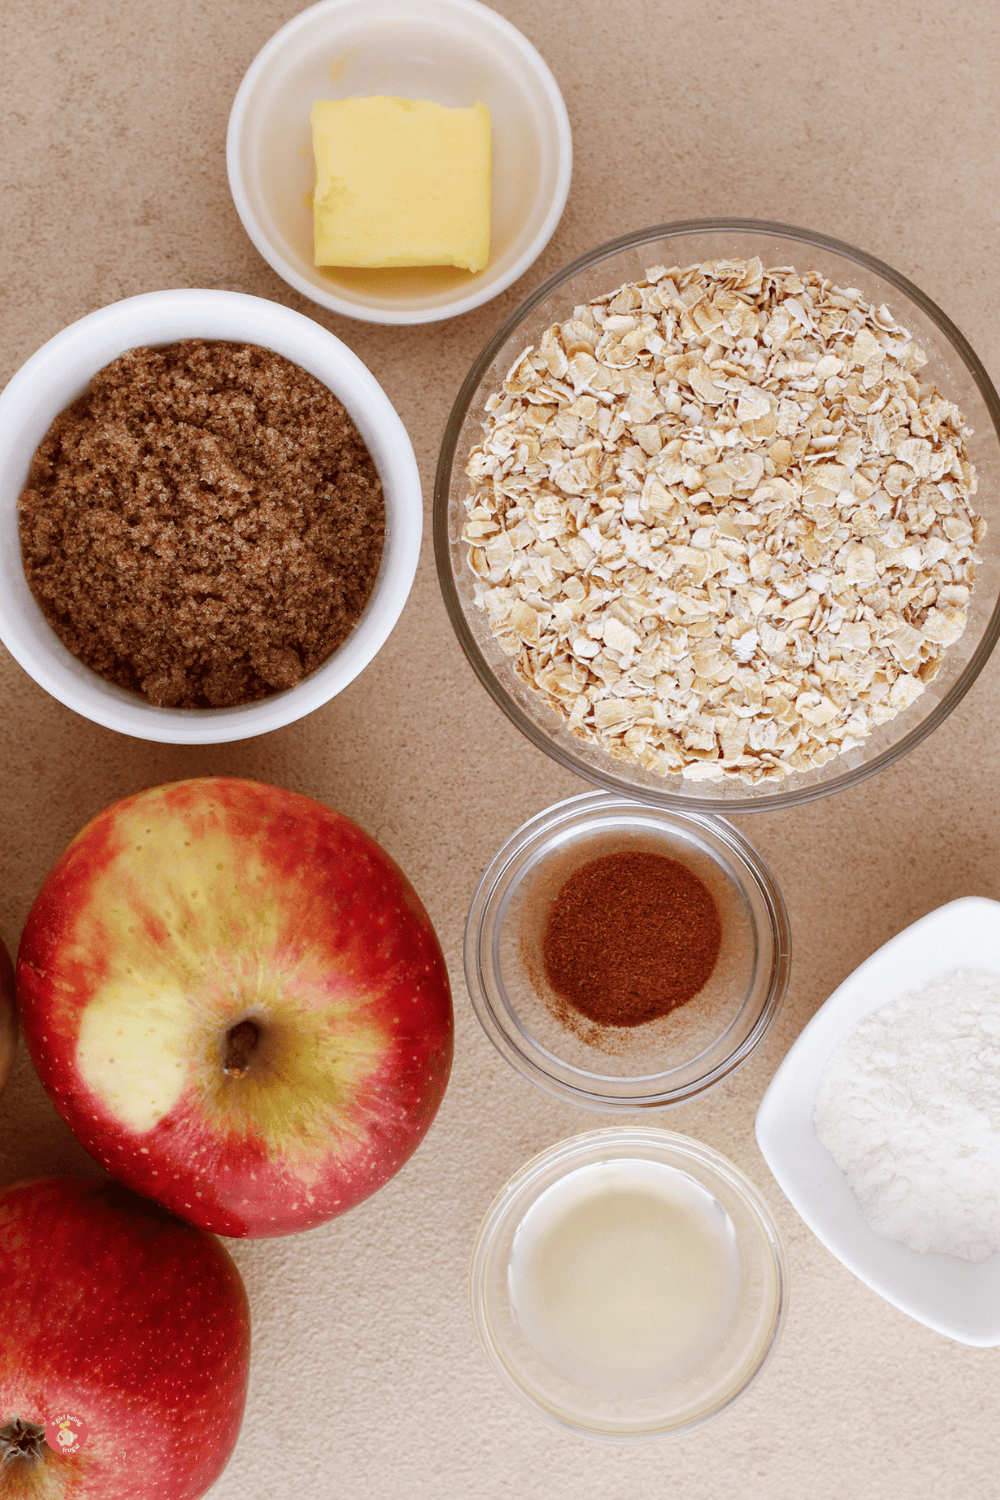
Before you start, gather the ingredients. For the apple filling, you’ll need:
- 3 large apples (Granny Smith, Honeycrisp, or Fuji work great)
- 2 tablespoons fresh lemon juice
- ¼ cup packed brown sugar
- 1 tablespoon all-purpose flour
- ½ teaspoon ground cinnamon
For the crisp topping:
- 1 cup old-fashioned oats
- ½ cup packed brown sugar
- ½ teaspoon ground cinnamon
- ¼ teaspoon salt
- ¼ cup melted butter
You’ll also need a baking dish and an oven preheated to 350°F (180°C). Once everything is ready, it’s time to get started on making your apple crisp.
Step-by-Step Instructions
Prepare the Apples
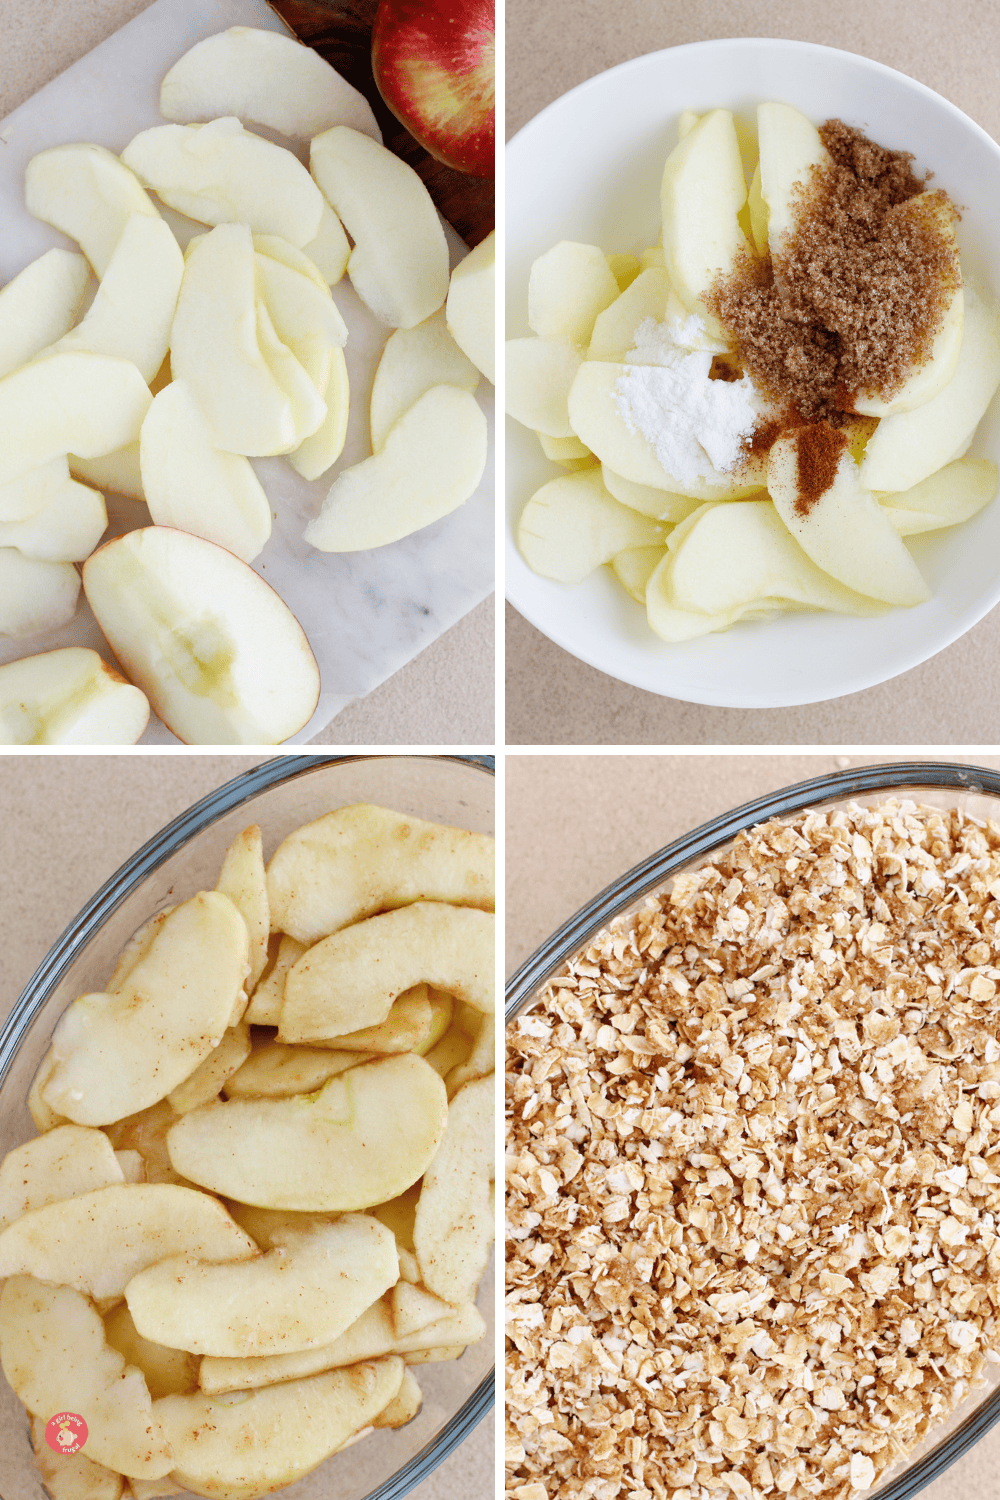
The first step in making a delicious apple crisp is preparing your apples. Peel, core, and slice them into thin, even slices. The thinner the slices, the quicker they’ll bake and become soft and tender. Once sliced, transfer the apples into a bowl and add 2 tablespoons of fresh lemon juice. This keeps the apples from browning and adds a hint of tang to balance the sweetness.
Next, sprinkle ¼ cup of packed brown sugar, 1 tablespoon of flour, and ½ teaspoon of cinnamon over the apples. The flour thickens the juices released by the apples during baking, creating a luscious filling. Mix everything well until the apple slices are evenly coated.
Once the apples are ready, pack them into your greased baking dish, spreading them evenly for uniform baking.
Make the Crisp Topping
Now for the crispy, buttery topping that makes apple crisp so irresistible. In a mixing bowl, combine 1 cup of old-fashioned oats, ½ cup of packed brown sugar, ½ teaspoon of cinnamon, and ¼ teaspoon of salt. Stir everything together until the ingredients are well distributed.
Melt ¼ cup of butter and pour it over the oat mixture. Toss the mixture until it forms a crumbly texture. You want the topping to have a breadcrumb-like consistency, which gives the apple crisp its signature crunchy texture.
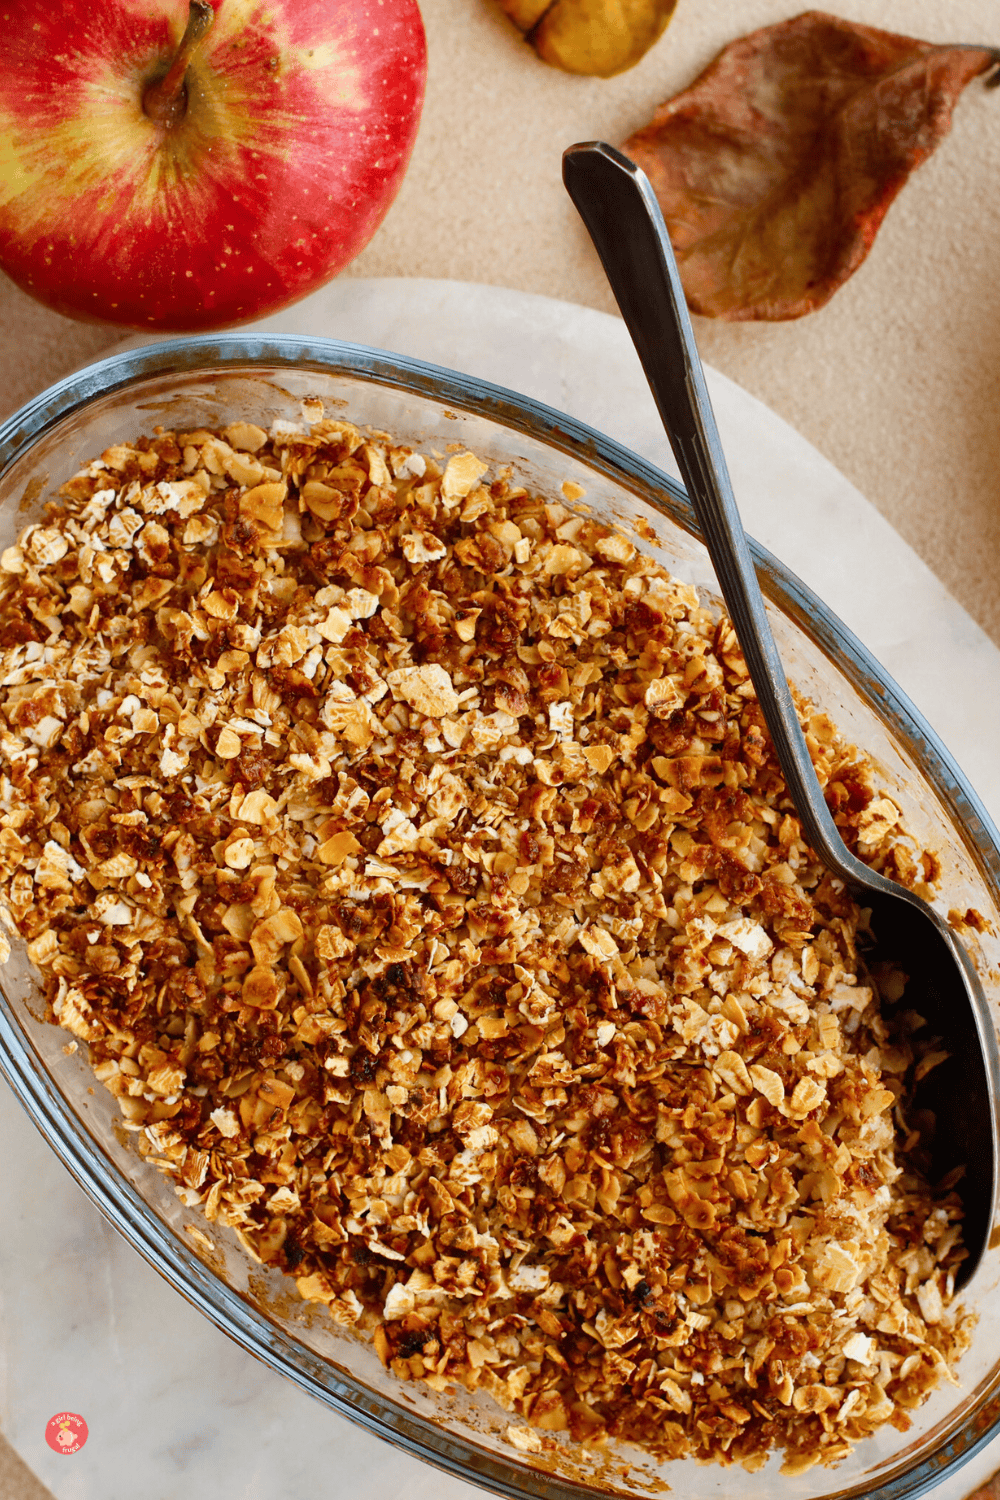
Generously sprinkle the topping over the apple filling, making sure to cover the apples completely. Press down lightly so the topping sticks to the apples.
Bake Your Apple Crisp
Place the baking dish on the middle rack of your preheated oven and bake at 350°F for 40-50 minutes. You’ll know it’s ready when the apple filling is bubbly and the topping is golden brown and crisp.
Let it bake fully for the best results. The apples will become soft and tender, and the topping will turn into a sweet, crunchy layer that perfectly complements the juicy filling.
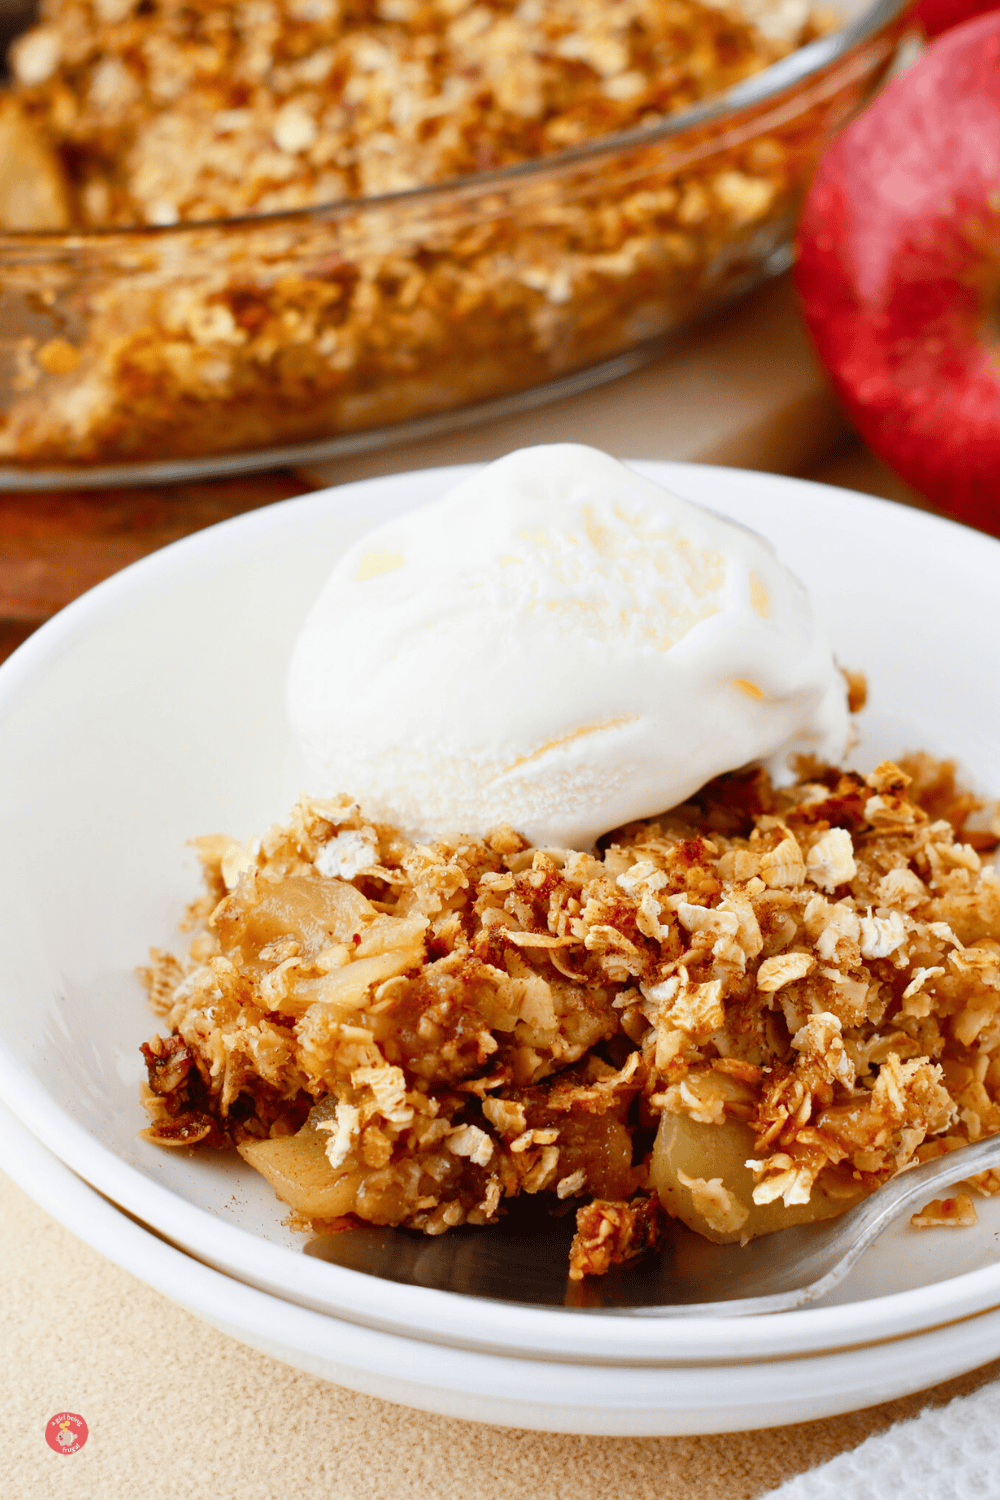
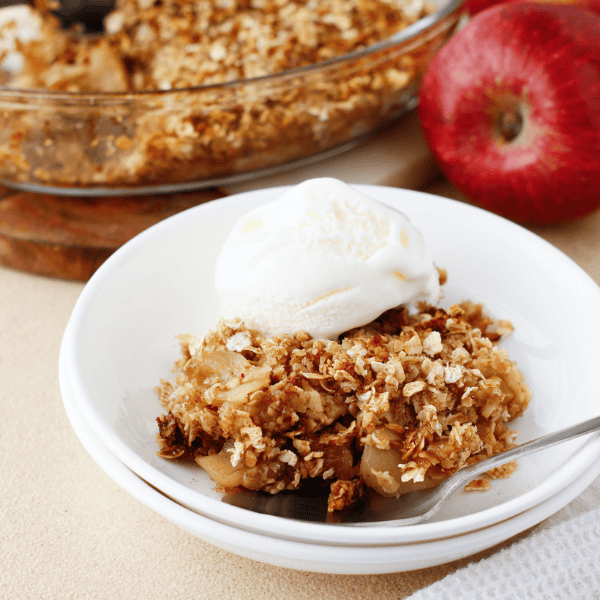
Serve and Enjoy
Once your apple crisp is done baking, remove it from the oven and let it cool for about 10-15 minutes. This allows the filling to set, making it easier to serve. Apple crisp is best enjoyed warm, and it’s even better when served with a scoop of vanilla ice cream or a drizzle of caramel sauce. The combination of warm apples and cold ice cream is a perfect match!
If you have leftovers, store them in the refrigerator for up to three days. Reheat individual portions in the microwave or warm the entire crisp in the oven at a low temperature until heated through.

Tips for Making the Best Apple Crisp
- Choosing the Right Apples: Tart apples like Granny Smith hold their shape well and provide a nice balance to the sweet topping. If you prefer a sweeter apple, Honeycrisp or Fuji are great options. For a mix of textures, consider using a combination of different apple varieties.
- Make it Your Own: You can customize this recipe to your liking. Add a handful of chopped nuts like pecans or walnuts to the topping for extra crunch. For more flavor, toss in some dried cranberries or raisins with the apple filling.
- Gluten-Free Option: To make this recipe gluten-free, substitute the all-purpose flour with a gluten-free flour blend, and use certified gluten-free oats.
Why You’ll Love This Easy Apple Crisp Recipe
This apple crisp recipe is perfect for beginners because it doesn’t require any special skills or equipment—just basic ingredients and a desire for delicious homemade dessert. It’s a versatile recipe that works for any occasion, whether you’re making a comforting weeknight treat or need a quick dessert for a family gathering.
It’s the ideal dessert for fall, but really, you can enjoy it any time of the year. The combination of warm apples and a crisp, buttery topping is irresistible.
Love this recipe? Don’t forget to print it, pin it to your favorite dessert boards on Pinterest, and rate or review it below if you try it! We’d love to hear how it turned out for you and see your photos!